When it comes to repairing walls, filling holes, or finishing drywall, many DIYers and even professionals often wonder: is joint compound the same as spackle? While these two products might seem similar at first glance, they serve very different purposes and are formulated for distinct tasks. Understanding the differences can save time, prevent mistakes, and ensure a flawless finish.
Short Answer – Quick Explanation
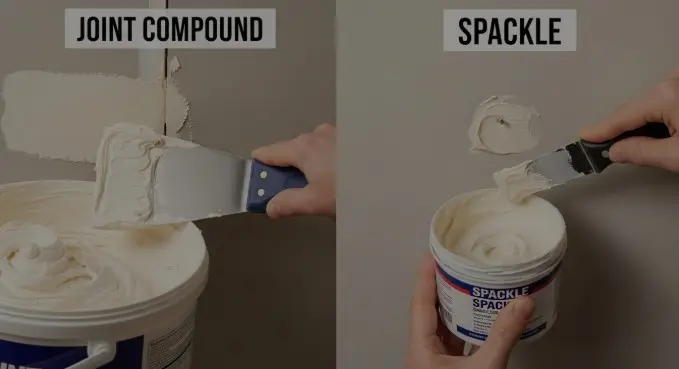
No, joint compound is not the same as spackle. Joint compound, also called drywall mud, is primarily used for taping, finishing, and smoothing large areas of drywall. Spackle is designed for small repairs, such as filling nail holes, dents, and minor wall imperfections. The main differences lie in composition, drying time, and ideal use.
Rule-of-thumb: Use spackle for minor fixes, joint compound for seams and large wall surfaces.
Understanding Joint Compound and Spackle
What is Joint Compound?
Joint compound is a thick, gypsum-based paste used extensively in drywall installation and finishing. Its composition typically includes:
- Gypsum powder as the main filler
- Additives for adhesion and smooth application
- Drying agents for controlled curing
Primary uses:
- Sealing drywall seams with tape
- Covering large patches or wall repairs
- Smoothing uneven surfaces before painting
Advantages:
- Smooth finish ideal for painting or wallpaper
- Excellent for large surfaces
- Easy to sand once dry
Limitations:
- Slower drying time than spackle
- Heavier and messier to apply
- Not ideal for small holes or quick fixes
What is Spackle?
Spackle is a lightweight wall repair paste, often made from resins, binders, and fine fillers. Unlike joint compound, it is formulated for quick patching of minor imperfections.
Primary uses:
- Filling small nail holes, dents, and cracks
- Quick touch-ups on painted walls
Advantages:
- Fast-drying for small projects
- Minimal shrinkage
- Easy for beginners to apply
Limitations:
- Not suitable for drywall seams or large surface areas
- Harder to feather over wide areas
Is Joint Compound the Same as Spackle?
Although they share similarities in being wall repair products, joint compound and spackle are not interchangeable:
| Feature | Joint Compound | Spackle |
|---|---|---|
| Ideal Use | Drywall seams, large surface finishing | Small holes, minor wall repairs |
| Drying Time | Several hours to overnight | Typically 30 minutes to 1 hour |
| Texture | Smooth, creamy, spreads easily | Thicker, paste-like, easy to dab |
| Shrinkage | Some shrinkage; may need multiple coats | Minimal shrinkage |
| Sanding | Easy to sand | Easy, but less forgiving on large areas |
| Cost | Economical in bulk | Slightly higher per small container |
| Longevity | Long-lasting for walls | Durable for small patches |
Key takeaway: Joint compound is for structural finishing, while spackle is for cosmetic touch-ups. Misusing one for the other can lead to cracking, uneven surfaces, or repeated repairs.
Sub-Questions People Also Ask
Can you use joint compound instead of spackle?
Yes, technically, but it’s not recommended for small holes because it dries slower, can crack, and is harder to sand smoothly in tight areas.
Can spackle be used for drywall seams?
No. Spackle is too lightweight and lacks the bonding strength needed to secure drywall tape and seams.
How long does joint compound take to dry compared to spackle?
Joint compound typically takes 12–24 hours per coat, while spackle can dry in as little as 30 minutes to 1 hour depending on thickness.
Which is easier for beginners: spackle or joint compound?
Spackle is generally easier for small repairs due to its quick-drying, low-mess formula. Joint compound requires more technique for taping, feathering, and sanding.
Can paint go directly over spackle or joint compound?
Yes, once both are fully dry and sanded smooth. Priming is recommended for the best adhesion, especially on large joint compound areas.
Step-by-Step Guide for Using Joint Compound and Spackle
Step 1: Preparing the Surface
- Remove loose debris, dust, or flaking paint
- Sand rough edges for smooth adhesion
- Wipe clean with a damp cloth to remove dust
Step 2: Applying Spackle
- Use a putty knife to fill small holes and dings
- Apply in thin layers, pressing firmly to eliminate air pockets
- Smooth edges to blend with surrounding wall
- Allow to dry (usually 30–60 minutes)
Step 3: Applying Joint Compound
- Use drywall tape for seams
- Apply the first thin coat with a wide taping knife
- Feather edges for a seamless finish
- Apply 2–3 additional coats as needed, letting each dry fully
Step 4: Drying and Sanding
- Spackle: Sand lightly with fine-grit sandpaper
- Joint compound: Sand between coats and after final layer for smooth wall finish
- Ensure dust is wiped away before painting
Step 5: Priming and Painting
- Apply primer over joint compound for uniform paint adhesion
- Spackle often requires minimal priming, depending on paint type
- Finish with your chosen paint for a flawless wall
Common Mistakes to Avoid
- Using joint compound for small nail holes (overkill and slower)
- Applying spackle on large seams (leads to cracking)
- Over-sanding or leaving uneven surfaces
- Ignoring recommended drying times, causing cracks or poor adhesion
FAQs About Joint Compound and Spackle
- Can spackle be used outdoors?
Some spackles are designed for interior use only. Always check the label before using outdoors. - How long does spackle last?
Properly applied spackle can last years for small repairs, but large structural repairs require joint compound. - Can joint compound be used over old paint?
Yes, as long as the surface is clean and free from peeling paint. Sanding and priming may be required. - Do I need to prime after using spackle?
For best results, lightly prime spackled areas to ensure paint adhesion and color uniformity. - What is the difference between lightweight and all-purpose joint compound?
Lightweight is easier to sand and faster drying, while all-purpose is stronger for multiple layers and taping. - Can you mix spackle and joint compound?
It’s not recommended; their chemical compositions differ and may cause cracking or poor adhesion. - How do I prevent cracks when using joint compound?
Apply thin coats, allow full drying between layers, and feather edges carefully. - Which dries faster, spackle or joint compound?
Spackle dries significantly faster, making it ideal for quick repairs.
Conclusion
In summary, joint compound and spackle are not the same. Joint compound is your go-to for drywall seams, large repairs, and smoothing walls, while spackle is perfect for small holes and cosmetic touch-ups. Understanding their differences, proper application techniques, and drying times ensures long-lasting, professional results.
Pro tip for homeowners: Keep both products in your toolkit, spackle for fast fixes and joint compound for serious wall projects. Mastering their use will make any wall repair or renovation task far easier and more durable. For proper installation visit The Kitchen Consultants now!