Subway tile is one of the most popular shower wall finishes for a reason: it’s timeless, durable, and works in both classic and modern bathrooms. But knowing how to install subway tile in a shower correctly is critical. Most shower tile failures don’t happen because of the tile they happen because of poor waterproofing, bad layout planning, or incorrect materials.
This guide is written to be the most complete, step-by-step, expert-backed resource available, whether you’re a confident DIYer or deciding if hiring a professional is the smarter move.
Short Answer — How to Install Subway Tile in a Shower
To install subway tile in a shower correctly, you must build a waterproof wall system first, plan your layout carefully, use the right thinset mortar and grout, and follow a precise installation sequence. Skilled DIYers can handle the job, but beginners often fail due to skipped waterproofing, poor alignment, or incorrect material choices. The most common shower tile failures are caused by water penetration behind the tile not the tile itself.
What You Need to Know Before Installing Subway Tile in a Shower
Is Subway Tile a Good Choice for Showers?
Yes—subway tile is an excellent choice for showers when installed properly.
- Durability: Ceramic and porcelain subway tiles are water-resistant and long-lasting
- Design longevity: Subway tile never goes out of style
- Maintenance: Easy to clean, but grout lines require care
The key is not the tile it’s the system behind it.
Building Codes and Waterproofing Basics (EEAT)
Waterproofing matters more than tile selection. Tile and grout are not waterproof.
- Showers must manage liquid water and water vapor
- Codes require approved backer boards and waterproof membranes
- Professional installers treat waterproofing as non-negotiable
If water gets behind the tile, mold, rot, and structural damage will follow.
How to Install Subway Tile in a Shower the Right Way
Installing subway tile in a shower the right way means treating the project as a waterproofing job first, tile job second.
How to Install Subway Tile in a Shower Wall System
- Cement board: Traditional, strong, requires membrane
- Foam board systems: Lightweight, pre-waterproofed, faster
- Never use drywall in a shower, even “green board”
Walls must be flat within 1/8 inch over 10 feet for clean tile lines.
Tools and Materials Needed to Install Subway Tile in a Shower
Essential Tools Checklist
- Wet saw or tile cutter
- Notched trowels (¼” × ⅜” common)
- Level and laser level
- Tile spacers
- Buckets and mixing paddle
Materials That Professionals Use
- Waterproofing membrane (sheet or liquid)
- Polymer-modified thinset mortar
- Cementitious or epoxy grout
- Penetrating grout sealer (if required)
How to Install Subway Tile in a Shower
Step 1 – Prepare the Shower Walls
- Remove old tile and inspect framing
- Ensure studs are plumb and square
- Install cement or foam backer board
Solid prep prevents uneven tile and cracked grout.
Step 2 – Waterproof the Shower Correctly
- Use sheet membranes for maximum reliability
- Liquid membranes require precise thickness
- Seal corners, seams, niches, and valve penetrations
Allow full cure time before tiling.
Step 3 – Plan the Subway Tile Layout
- Dry-lay tiles to find the best starting point
- Center the layout to avoid tiny edge cuts
- Choose pattern:
- 50% offset (classic)
- ⅓ offset (reduces lippage)
- Vertical or stacked (modern look)
Step 4 – Apply Thinset Mortar Properly
- Use the correct trowel size
- Comb thinset in one direction
- Back-butter tiles for full coverage
- Wet areas require 95% coverage minimum
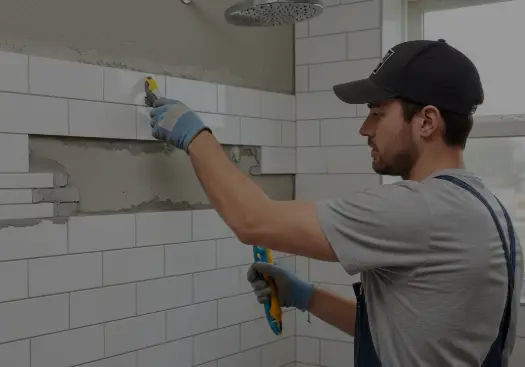
Step 5 – Install Subway Tile in the Shower
- Start with a perfectly level reference line
- Work upward to avoid slippage
- Use spacers consistently
- Check level every few rows
Step 6 – Cut Tiles for Corners, Niches, and Valves
- Use wet saw for clean edges
- Leave proper movement gaps at corners
- Use trim or metal edging where needed
Step 7 – Grout the Subway Tile Shower
- Use cement grout or epoxy for showers
- Force grout fully into joints
- Clean haze in stages to avoid residue
Step 8 – Seal, Cure, and Final Inspection
- Seal grout if required
- Wait 24–72 hours before shower use
- Inspect for gaps, pinholes, or missed grout
Common Subway Tile Shower Layout Options
Most Popular Subway Tile Patterns for Showers
- Traditional brick pattern: Timeless and forgiving
- Vertical subway tile: Makes ceilings look taller
- Herringbone accents: High-end focal points
- Stacked layout: Clean, modern aesthetic
Subway Tile Installation Options in a Shower
| Factor | DIY Installation | Professional Installation |
|---|---|---|
| Cost | Lower upfront | Higher upfront |
| Waterproofing Accuracy | Risky | Very high |
| Time Required | Long | Fast |
| Code Compliance | Uncertain | Guaranteed |
| Long-Term Durability | Variable | Excellent |
| Warranty | None | Often included |
Mistakes to Avoid When Installing Subway Tile in a Shower
Costly Errors That Lead to Leaks or Failure
- Skipping waterproofing steps
- Using mastic instead of thinset
- Poor layout planning
- Choosing the wrong grout
Most shower failures occur behind the tile, not on the surface.
Maintenance and Longevity of Subway Tile Showers
How to Keep Subway Tile Showers Looking New
- Clean regularly with pH-neutral cleaners
- Dry walls after use to reduce mildew
- Re-seal grout every 1–3 years if needed
Proper maintenance can extend the life of a subway tile shower for decades. Planning a bathroom remodeling project? Get expert design, waterproofing, and tile installation done right
FAQs — How to Install Subway Tile in a Shower
How to install subway tile in a shower for beginners?
Beginners should use foam board systems, pre-mixed membranes, and avoid complex layouts.
How to install subway tile in a shower without a niche?
The process is simpler—just maintain clean corners and consistent spacing.
Can you install subway tile directly over drywall in a shower?
No. Drywall is not code-approved for wet shower walls.
What thinset is best to install subway tile in a shower?
Polymer-modified thinset rated for wet areas.
How high should subway tile go in a shower?
Typically to the ceiling for best moisture protection.
Do you need to seal subway tile in a shower?
Tile usually doesn’t, but grout often does.
How long before using a shower after installing subway tile?
At least 24–72 hours after grouting.
Vertical vs horizontal which subway tile layout is better for showers?
Horizontal is classic; vertical makes walls appear taller.
Final Thoughts — How to Install Subway Tile in a Shower Successfully
Installing subway tile in a shower is 90% preparation and waterproofing, 10% tile. When done correctly, it delivers unmatched durability and timeless style. DIY is possible with precision and patience, but professional installation offers peace of mind and long-term reliability.
Expert takeaway: A perfectly tiled shower starts behind the tile never cut corners where water is involved.