Keeping your kitchen countertop looking pristine is essential for both hygiene and aesthetics. Over time, grout—the material that fills the gaps between your tiles can crack, discolor, or even harbor mold. Regrouting your kitchen counter tile restores its appearance, prevents water damage, and prolongs the life of your countertop. In this comprehensive guide, we’ll walk you through everything you need to know about how to regrout kitchen counter tile, including step-by-step instructions, tools, types of grout, tips, and answers to the most frequently asked questions.
Short Answer: How to Regrout Kitchen Counter Tile
For those looking for a quick solution, here’s a concise overview:
- Remove old grout using a grout removal tool (manual or electric).
- Clean the joints to remove dust and debris.
- Apply new grout with a rubber float, pressing it into the joints.
- Wipe off excess grout from the tile surface with a damp sponge.
- Let the grout dry according to manufacturer instructions, then apply a sealer.
Time Estimate: 2–4 hours for an average kitchen countertop
Difficulty Level: Moderate, suitable for DIYers with patience
Tools Needed: Grout removal tool, rubber float, sponge, bucket, gloves, safety glasses
This short answer provides a quick solution, but for lasting results, follow our detailed guide below.
Why and When You Should Regrout Kitchen Counter Tile
Signs Your Countertop Needs Regrouting
Knowing when to regrout is essential. Look for these common indicators:
- Cracked or missing grout: Gaps between tiles can allow water to seep underneath, causing damage.
- Discoloration or mold growth: Dark grout lines or mold indicate moisture infiltration.
- Loose or shifting tiles: If tiles feel wobbly, the grout is failing to hold them in place.
Benefits of Regrouting
Regrouting isn’t just cosmetic it protects your investment:
- Enhances kitchen aesthetics: Fresh grout lines instantly make your countertop look cleaner and newer.
- Prevents water damage: Properly filled joints block water from seeping under tiles.
- Extends tile lifespan: Regrouting strengthens the overall structure of your tiled surface.
Common Mistakes to Avoid
To achieve professional results, avoid these pitfalls:
- Using the wrong type of grout for your tile spacing or environment.
- Skipping the sealing step, which leaves grout porous and prone to staining.
- Overfilling joints, causing excess grout to dry unevenly or crack.
How to Regrout Kitchen Counter Tile
Tools and Materials Required
Before starting, gather the following:
- Grout removal tool (manual or electric)
- Rubber float and sponge
- Bucket for mixing
- Grout (sanded for wider joints, unsanded for narrow)
- Sealer
- Gloves and safety glasses
Preparation Steps
- Clean the tiles: Remove debris, grease, and any surface dirt.
- Remove old grout: Use your grout removal tool carefully to avoid chipping tiles.
- Protect surrounding areas: Use painter’s tape or plastic sheeting to shield countertops and cabinets.
Applying New Grout
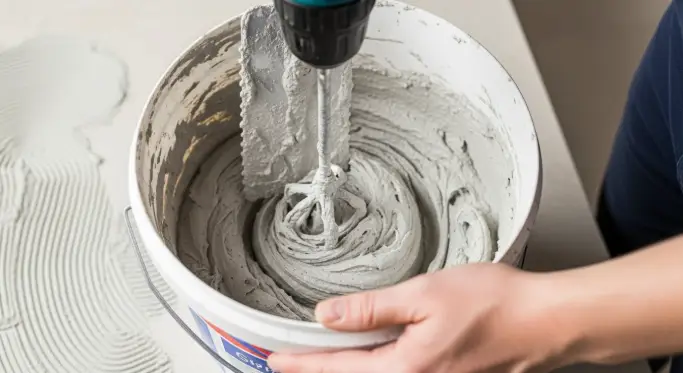
- Mix the grout following the manufacturer’s instructions.
- Fill joints: Use a rubber float to press grout firmly into the gaps.
- Remove excess: Hold the float at a 45-degree angle to scrape off extra grout.
- Smooth joints: Run a damp sponge diagonally across tiles to level the grout lines.
Finishing Touches
- Allow grout to cure fully usually 24–72 hours.
- Apply a grout sealer to prevent stains and moisture infiltration.
Estimated Time & Difficulty
- Preparation: 30–60 minutes
- Grouting: 1–2 hours
- Curing & sealing: 24–72 hours
- Tips: Beginners should work in small sections; advanced DIYers can tackle the full countertop at once.
Types of Grout for Kitchen Counter Tiles (Comparison Table)
| Grout Type | Best For | Pros | Cons | Cost Estimate |
|---|---|---|---|---|
| Sanded Grout | Wider joints (1/8”+) | Durable, prevents cracking | Harder to apply on small joints | $5–$10 per lb |
| Unsanded Grout | Narrow joints (<1/8”) | Smooth finish, easy to apply | Less durable | $6–$12 per lb |
| Epoxy Grout | High-moisture areas | Stain-resistant, strong | Expensive, harder to clean | $15–$20 per lb |
| Pre-Mixed Grout | Quick DIY | Ready-to-use, easy | Limited color options | $8–$15 per tub |
Tips & Tricks for a Perfect Regrouting Job
Color Matching and Aesthetics
- Test grout colors on a small, inconspicuous area.
- Consider tinted sealer to unify grout color with existing tiles.
Preventing Mold and Mildew
- Ensure good ventilation in the kitchen while curing grout.
- Use antimicrobial grout for long-lasting protection against mold.
Speed vs. Quality
- Don’t rush grout needs proper curing time.
- Optimal working temperature: 65–75°F, moderate humidity, to prevent cracking.
Frequently Asked Questions (FAQs)
1. Can I regrout over old grout without removing it?
It’s possible in minor cases, but removing old grout ensures better adhesion and prevents future cracking.
2. How long does regrout take to cure before using the countertop?
Typically 24–72 hours depending on grout type and humidity.
3. Can I do this myself or should I hire a professional?
DIY is feasible for experienced home renovators; professionals are recommended for epoxy grout or large areas.
4. What’s the difference between sanded and unsanded grout?
Sanded grout is for wider joints, more durable, while unsanded is smooth and better for narrow gaps.
5. How do I remove grout stains from tiles?
Use a damp sponge immediately; for dried stains, try a grout haze remover or mild vinegar solution.
6. Can regrouting fix cracked tiles?
Regrouting fills gaps but does not repair the tile itself; cracked tiles must be replaced.
7. How often should kitchen countertops be regrouted?
Every 5–10 years, depending on wear, moisture, and cleaning habits.
8. Is epoxy grout worth the extra cost for kitchen counters?
Yes, for high-moisture or heavily used countertops, epoxy grout is durable and stain-resistant.
Conclusion: Mastering Kitchen Counter Regrouting
Regrouting your kitchen counter tile is only affordable when you hire The Kitchen Consultants, high-impact DIY project that enhances aesthetics, prevents water damage, and extends the life of your tiles. By following this comprehensive guide choosing the right grout, preparing the surface, and applying it correctly you can achieve professional results at home. Remember, patience and attention to detail are key. With proper tools and techniques, even beginners can transform an old, tired countertop into a fresh, clean surface ready for daily use.
For ongoing maintenance, consider sealing your grout periodically and inspecting tiles regularly to ensure long-lasting beauty. Mastering how to regrout kitchen counter tile empowers you to keep your kitchen not only functional but visually stunning for years to come.