When planning a kitchen renovation, homeowners often focus on cabinet style, countertops, and appliances but one small detail can make a huge difference in both aesthetics and durability: edge banding. Edge banding on cabinets refers to the thin strips of material applied to the exposed edges of cabinet panels to protect them from moisture, chips, and wear. Beyond protection, edge banding creates a seamless, professional finish that elevates the overall look of your kitchen.
Modern kitchens demand sleek, durable, and low-maintenance surfaces, making edge-banded cabinets an essential feature. Despite its importance, many homeowners overlook this detail during remodels, often resulting in cabinets that age poorly or look unfinished.
In this guide, we’ll explore what edge banding is, the types of materials used, current trends in kitchen renovation, a step-by-step installation guide, common mistakes to avoid, and strategies to maximize ROI. Whether you’re remodeling your entire kitchen or simply upgrading cabinets, understanding edge banding can save time, money, and frustration while boosting the visual appeal of your space.
Section 1: What is Edge Banding?
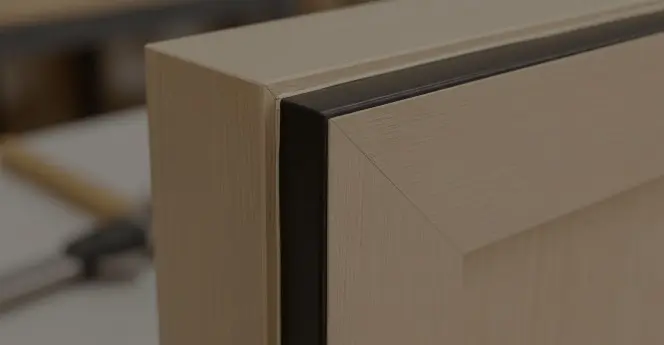
Edge banding is a narrow strip of material applied to the exposed edges of kitchen cabinets. Its main purpose is to protect cabinet panels often made from plywood, MDF, or particleboard from moisture, chipping, and damage during everyday use. Edge banding also enhances the visual appeal of cabinets by creating clean, seamless edges.
Common Materials for Edge Banding:
- PVC (Polyvinyl Chloride): Affordable, durable, and moisture-resistant, making it ideal for budget-conscious renovations.
- Wood Veneer: Offers a natural look with high durability, suitable for mid-range kitchen cabinets.
- Melamine: Durable and cost-effective but less flexible than PVC or veneer.
- Acrylic: High-gloss finish, premium appearance, and extremely durable perfect for luxury kitchens.
Why Edge Banding Matters:
- Protection: Shields exposed edges from water damage and wear.
- Aesthetics: Creates uniform, seamless cabinet edges.
- Longevity: Extends the lifespan of your cabinetry, preventing early replacement.
Section 2: Kitchen Renovation Trends Featuring Edge Banding
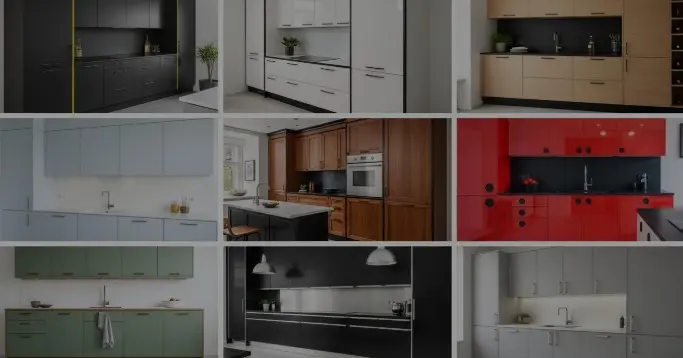
Edge banding has become a subtle yet essential component of modern kitchen design. Current trends emphasize minimalist, seamless cabinetry, where visible seams are virtually eliminated. This aligns perfectly with edge-banded cabinets, which can be matched to cabinet colors for a cohesive look.
Trending Features:
- Seamless Cabinetry: Edge-banding allows for clean, uninterrupted cabinet lines.
- Matte vs. Glossy Finishes: Edge-banding options now come in matte, satin, and glossy finishes to match modern cabinet aesthetics.
- Durable, Low-Maintenance Materials: PVC and acrylic edge banding resist moisture and daily wear.
- Sustainable & Eco-Friendly Options: Increasingly, manufacturers offer recycled or low-VOC materials for environmentally conscious kitchens.
Incorporating edge-banding ensures that even budget-friendly cabinets look high-end while maintaining durability. Whether you’re renovating a mid-range kitchen or a luxury space, edge-banded cabinets contribute to both aesthetics and value.
Section 3: Step-by-Step Guide to Installing Edge Banding
Installing edge banding can be a DIY-friendly project, though professionals ensure a flawless finish.
Tools Required:
- Edge banding machine or iron
- Roller or block for pressing
- Utility knife or trimmer
- Sandpaper or edge file
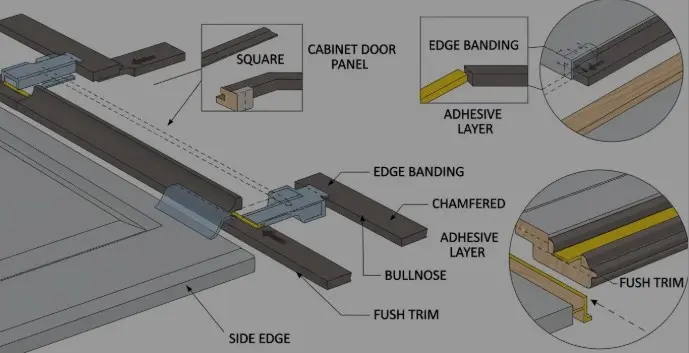
Installation Steps:
- Measure and Cut: Measure the edge length and cut the banding slightly longer than the edge.
- Apply Adhesive: Use pre-glued edge banding or apply a thin layer of wood adhesive.
- Heat & Press: If using heat-activated adhesive, apply heat with an iron while pressing the banding onto the edge. Use a roller to ensure full adhesion.
- Trim Excess: Use a utility knife or edge trimmer to remove overhanging material.
- Smooth Edges: Sand or file edges lightly for a seamless finish.
- Inspection: Check for loose edges, gaps, or air bubbles and touch up as needed.
Tips:
- DIY edge-banding is possible with proper tools and patience.
- Professionals achieve more precise edges, especially for large-scale renovations or high-end finishes.
Section 4: Common Mistakes to Avoid
Avoid these mistakes to ensure a professional-looking finish:
- Wrong Material Choice: Selecting a material not suited for kitchen moisture levels can reduce durability.
- Improper Trimming: Rough edges make cabinets look unprofessional and may peel over time.
- Skipping Surface Preparation: Dirty or uneven edges prevent proper adhesion.
- Color Mismatch: Ensure edge banding color matches cabinet panels for a cohesive look.
- Neglecting Maintenance: Regular cleaning prevents adhesive breakdown and keeps edges intact.
Section 5: Maximizing ROI on Kitchen Cabinets with Edge Banding
Edge-banding can significantly improve your kitchen’s resale value by enhancing durability and aesthetics.
ROI Tips:
- Choose Durable Materials: PVC offers budget-friendly durability, while wood veneer and acrylic appeal to buyers looking for luxury.
- Seamless Appearance: Well-finished edges enhance visual appeal and make the kitchen look high-end.
- Budget Wisely: DIY installations save costs but consider professional help for flawless results, especially in mid- to high-end kitchens.
Comparison Table:
| Material Type | Cost | Durability | Visual Appeal | Best Use Case |
|---|---|---|---|---|
| PVC | Low | Medium | Moderate | Budget kitchens |
| Wood Veneer | Medium | High | High | Mid-range kitchens |
| Acrylic | High | High | Premium | Luxury kitchens |
Proper edge-banding not only protects cabinets but adds value by making the kitchen look modern, well-maintained, and professionally finished.
Section 6: FAQ
- What is the difference between edge banding and laminate?
Edge banding is a thin strip applied to exposed edges, while laminate covers the full surface. Banding ensures edge protection and a seamless finish. - Can I install edge banding myself?
Yes, with the right tools and careful measurement. For large kitchens or luxury cabinets, professionals provide cleaner, more durable results. - How long does edge banding last on kitchen cabinets?
High-quality edge banding can last 10–20 years, depending on material and usage. PVC and acrylic are most durable. - What is the cost of edge banding per cabinet?
Costs vary based on material: PVC ($5–$10 per linear foot), wood veneer ($10–$15), acrylic ($15–$25). Professional installation adds labor charges. - Are there eco-friendly edge banding options?
Yes, recycled PVC, low-VOC adhesives, and sustainably sourced wood veneer are available for environmentally conscious homeowners.
Conclusion
Edge banding may seem like a minor detail, but it plays a crucial role in the durability, aesthetics, and value of kitchen cabinets. From protecting edges against moisture and wear to providing a seamless, professional finish, properly installed edge banding can elevate any kitchen remodel. By choosing the right material, avoiding common mistakes, and considering professional installation when needed, homeowners can maximize both the longevity and ROI of their kitchen cabinets.
Upgrade your cabinets today with The Kitchen Consultants and experience the difference in durability and style. Whether you’re doing a full remodel or a simple cabinet upgrade, edge banding ensures your kitchen looks polished, lasts longer, and appeals to future buyers.